Showing posts with label Food Wednesdays. Show all posts

Monday, July 4, 2022

T Stands for Weekend Fun and Food Wednesdays

 Hi everyone.

 Happy first full week of July. For all of us in the northern hemisphere,  we're really into summer now, aren't we?

This past weekend was a busy one for me. My husband took Friday off, and we went out in his boat. We went for a cruise, and we also did some fishing. 

Here's the highlight photo from the day, although I understand probably most (or maybe none) of  you  really are interested in fishing.


This fish my husband caught was a beauty. We measured him (30 inches; he was legal to keep), but after the trophy photos,  we put him back into the water, and he swam off on his way.  Even though we both like to eat fish, he deserved a chance to swim more days. I am sure many or most fishermen would have kept him.

We were supposed to go boating again on Saturday with my daughter and her fiance, but the morning was stormy. They still came to visit Saturday evening. We went boating with them on Sunday. 

This time we let the future son-in-law do the fishing, and he caught 2.


Both of his fish were too small to keep but still beauties. I like that they are swimming back in the river.  I didn't do any striper fishing this weekend myself. I often do fish, but Friday I was more interested in lounging, and Sunday the boat seemed a bit crowded with 4 of us in it. Besides, since it was Sunday,  lots of people were on the water so our boat was rocking and lots of water kept washing in around  the transom (the lower part where the engine attaches). The water drained right back out, but we did have some good laughs at how wet  our feet were while  sitting in the boat.
I did go mackerel fish both days but the mackerel fishing hasn't been very good lately.

Is anyone else having issues with getting all your photos to show up when you try to get them to link to your post in blogger? I can get into them through Google albums, but not directly. 

There was also way too much food this weekend, so I will be sharing my drinks and my food for both T day over at Bleubeard's and Elizabeth's blog and also for Kathy's Food Wednesdays

 My daughter and her fiance arrived  Saturday late afternoon. By then the weather had cleared out so for dinner we went to Pop's. We had  perfect timing too. When we got there there was no line. By time we ordered there was a line. And we also were able to get a table on the deck to eat our dinner.


Yes this top view of the deck is a bit skewed. And below you can see our food except my daughter's lobster roll, which she was about to take a bit of.


My husband and Zach had chicken fingers. My daughter and I had lobster rolls. The lobster roll comes with French fries but I substituted cole slaw.  I really like their slaw as it is not saucy at all but still has lots of flavor.  I must also write that the price of lobster rolls have gone up $3 since  Pop's opened in May. Right now they are $25.99. OUCH!  I am at the very top of my lobster roll paying price (and at that price I am not buying them very often- that's for certain). I decided to have one Saturday evening because it had been a warm day so
a cold sandwich tasted good for dinner. I also think that lobster rolls might go up even more in price so I thought I would splurge and have one before I can't because they've gotten too pricey.  I do think Pop's is trying to keep the price under control though since that price is still a bargain, well a bargain for right now. My husband saw them at one restaurant for $38.99. I am sure a lot of this has to do with the cost of fuel right now. 

I hope this doesn't end up being my last lobster roll of the season as it seems the season has just begun.

You can see our assorted drinks for this week's T day.  I like an icy fountain soda but my daughter brought a soda from home and her fiance drank his water.

On the boat Sunday for lunch we had "dry sandwiches and salty chips".  Or at least that's what we called them. Smile.

My husband bought some Italian cold cuts and provolone cheese, but figured any other sandwich "fixings" would only be messy. And I wanted ripple chips instead of plain sliced chips. The only ripple chips were not low salt ones, and boy, they seemed so salty. 


Anyhow, salty chips and a dry sandwich are best washed down with an Old Brown Dog Ale.


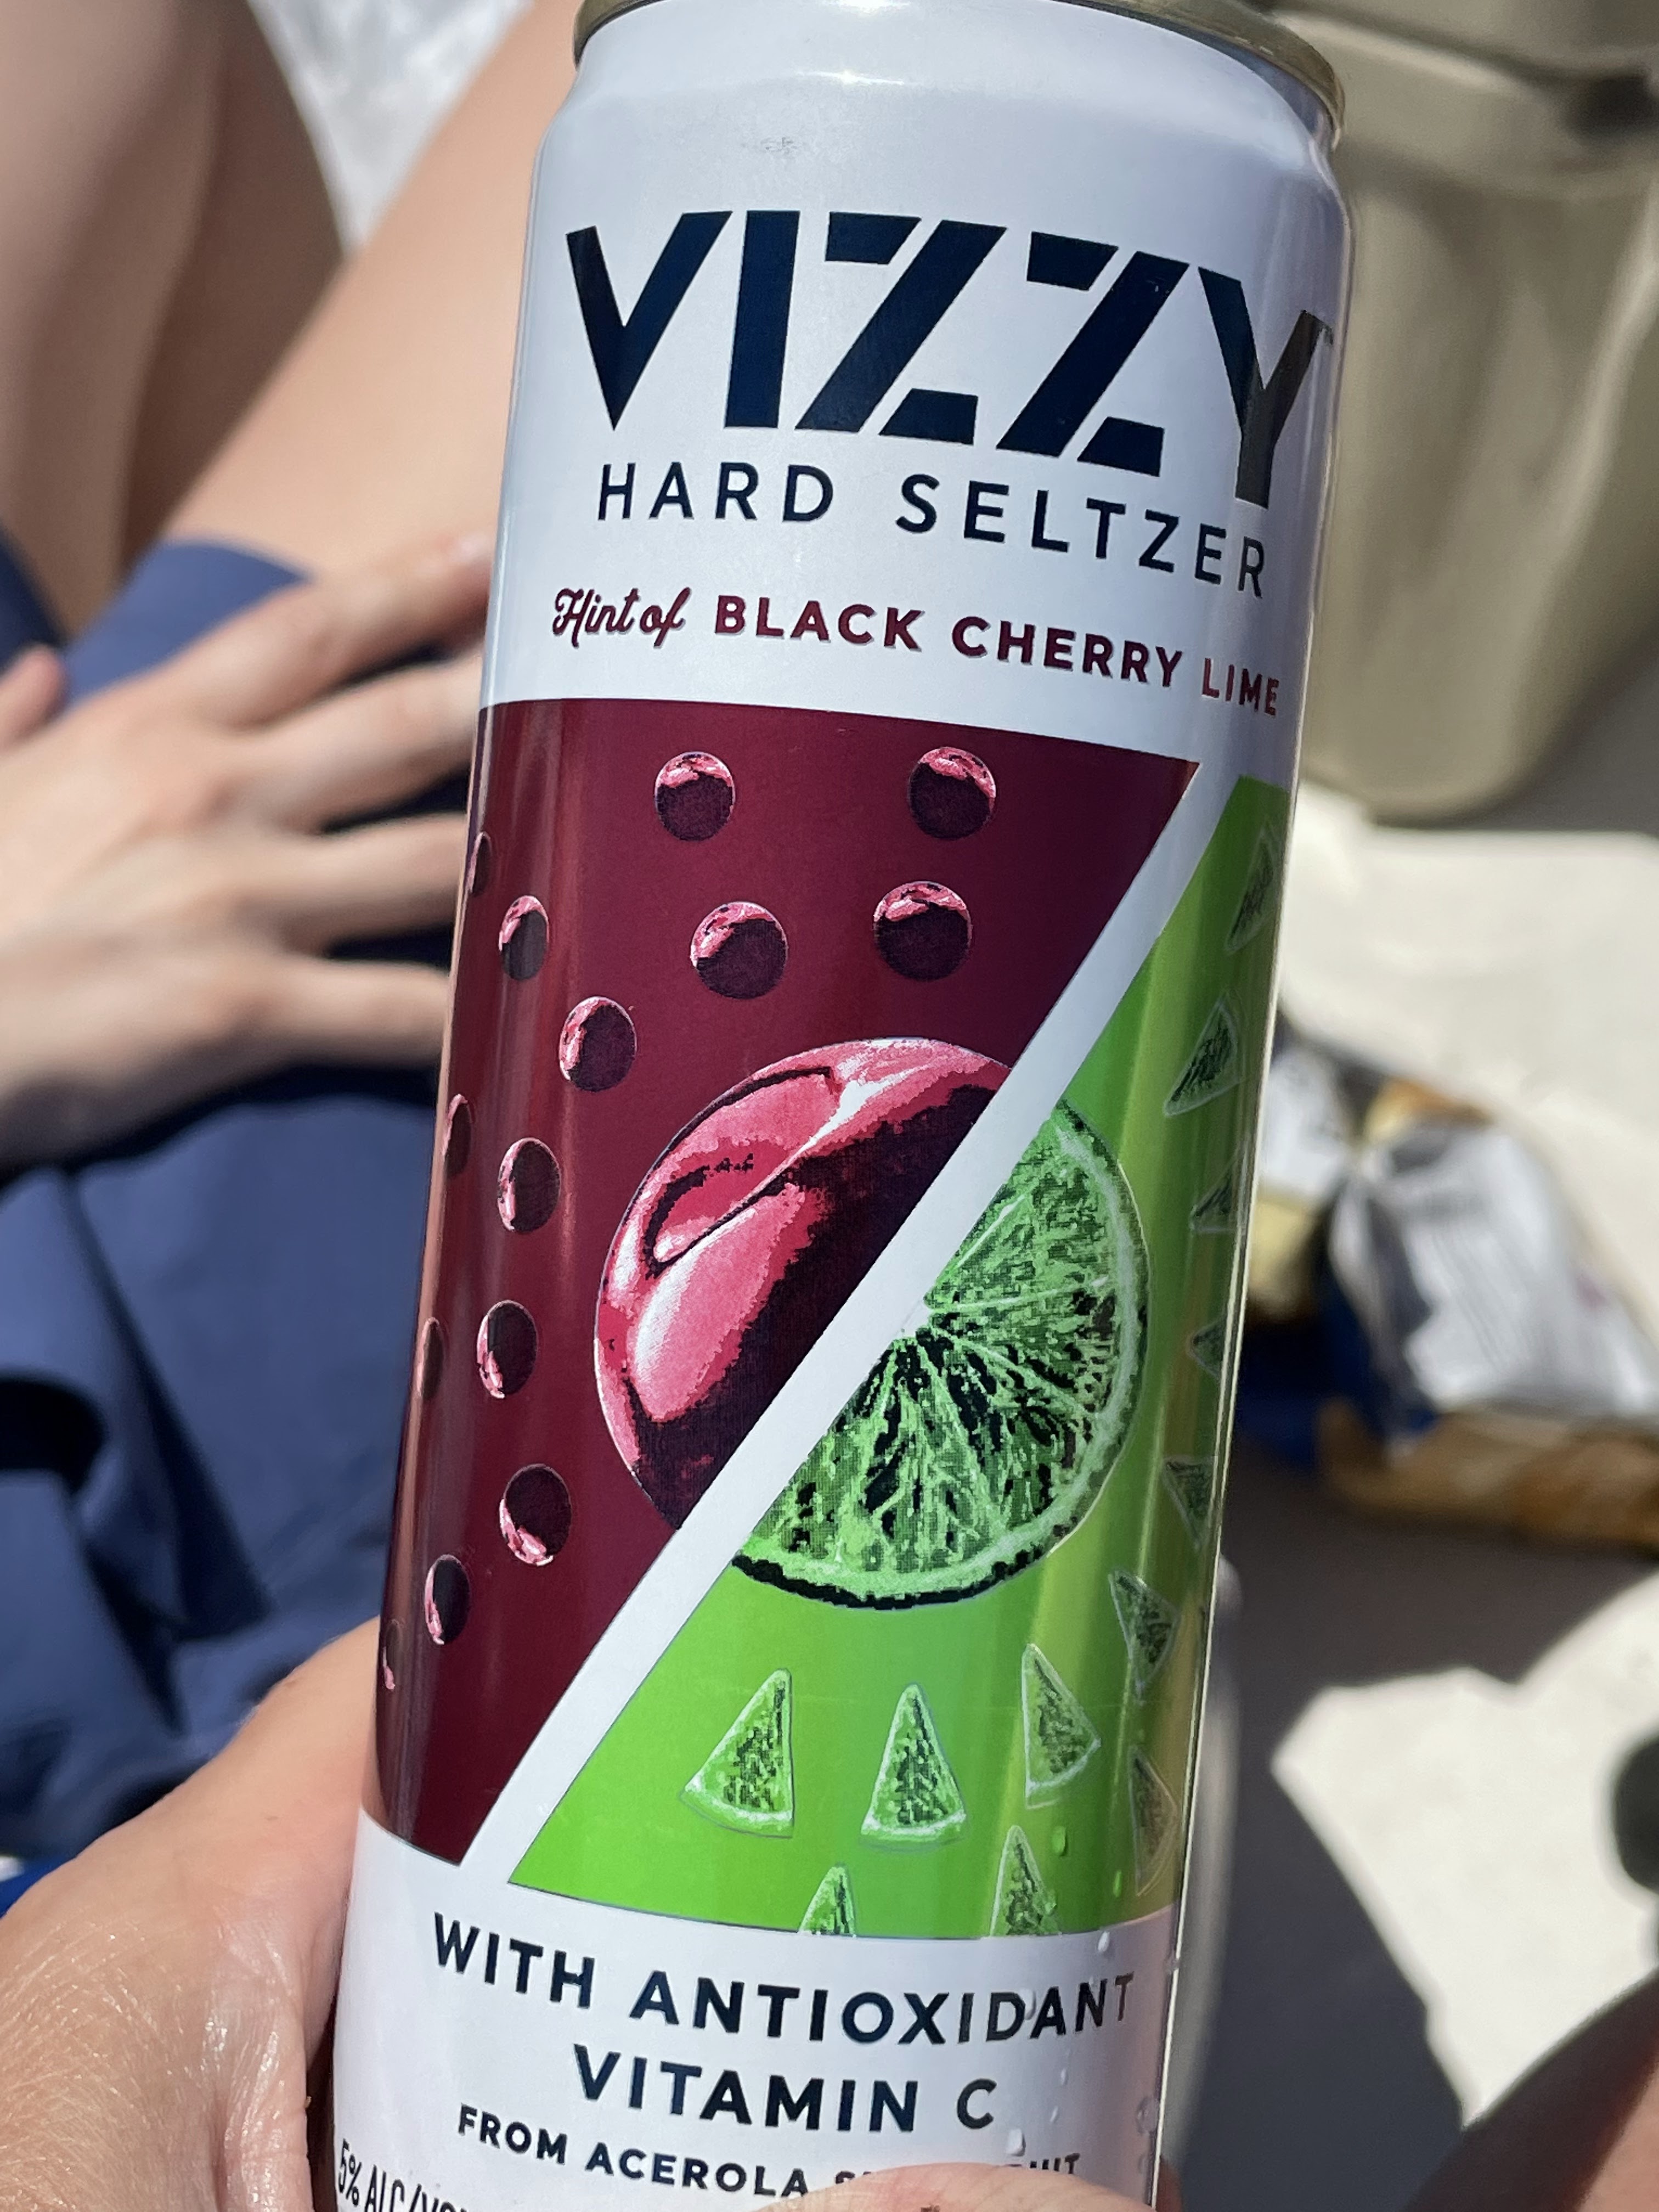
And here's one more drink for this post. I tried one of these hard seltzer's my daughter brought. I don't mind a hard seltzer when it's hot. I did think there was a strong hint to the black cherry flavor, but when I looked up acerola fruit I discovered it is a cherry like fruit. Not sure that explains the strong cherry taste, but I certainly enjoyed it as the afternoon heated up.


Ad that's all for me today. Thanks for visiting. I hope everyone has a wonderful T day food Wednesday and week ahead. 


Tuesday, May 31, 2022

A Traditional New England Sandwich

Hi everyone. This is the second day this week where I've posted twice.  I wanted to share my weekly food post at Kathy's Food Wednesday, especially now that for the summer Food Wednesdays is only going to happen on the first Wednesdays of the month.

First let me repost a photo I showed you in the last couple of weeks. 

This past Friday night my husband came home from work early and took me out to dinner. He said he wanted to do something summery as it was a beautiful day and evening.  Plus he said I hadn't had my first lobster roll of the season yet. (On my first trip to Pop's this year the lobster rolls were already sold old.)


I live relatively close to the seacoast (anywhere from a half to an hour away depending where I am exactly going), and the local lobster industry is strong there. That means lobster rolls are on the menus at many restaurants. I think one of the best ones around is at Pop's Clam Shack, which is a seasonal take out restaurant not too far from my house.


I know, the roll is hard to see. Traditionally, New England lobster rolls are served on buttered grilled hot dog rolls (which is New England are traditionally cut along the top not the side). Pops uses mayo to hold the lobster in the  roll together, but in some places butter replaces the mayo. In some places the lobster in the roll is hot, but I prefer cold lobster, and that's what most places in New Hampshire do. 

I had to get a fork to eat some of the lobster, and then I ate the rest of my sandwich in the roll. Lots of restaurants don't fill the rolls as full as Pop's does. I am surprised that this year the cost  at Pop's has only gone up $1 from last year, seeing diesel fuel which many lobster boats run on is over $6 a gallon here in the state. I was talking with my SIL's husband (who works in the food industry in Maine), and he told me that some places in Maine are charging $40 for a lobster roll. OUCH! Right now Pop's is charging $22, which isn't inexpensive by any means, but still in the budget for a couple of summertime splurges before Pop's closes over Labor Day (the first Monday in September).

I may not be able to have many of these this summer, especially if the price goes up any higher, but I will say I did enjoy this one. At Pop's the roll comes with fries, but for $1 more you can upgrade to onion rings which is what I did. 

If you skip the mayo or butter, lobster is pretty healthy to eat, as long as you don't over due your cholesterol for that day because one serving of lobster is about 70% of your daily cholesterol.  But lobster does have a nice amount of omega 3 which helps counteract your blood cholesterol level.  And the grilled hot dog roll doesn't count in these nutritional values either.

Lobster is a low calorie food packed with vitamins and minerals. A 1-cup (145-gram) serving of cooked lobster provides ( 2 ):
...
Nutrition
Calories: 128.
  • Protein: 27 grams.
  • Fat: 1.2 grams.
  • Carbs: 0 grams.
  • Copper: 198% of the Daily Value (DV)
  • Selenium: 190% of the DV.
  • Zinc: 53% of the DV.
  • Vitamin B12: 51% of the DV.


OK, enough chatter from me. Happy June to everyone.

Tuesday, May 24, 2022

Quiche for Lunch

 Hi everyone. I hope everyone's week is going well. 

This week for Food Wednesday over at Kathy's blog-Hummingbird Studio at the Lake, I want to share  last week's savory bake.  I was inspired to make a savory dish  because my older asparagus plant gave me a few fresh stalks  to eat, and I was also able to pick a bit of spinach growing my cold frame. We even had a couple of slices of left over bacon in the frig.

It didn't take a whole lot of thought to know that it was time to make a quiche.
 

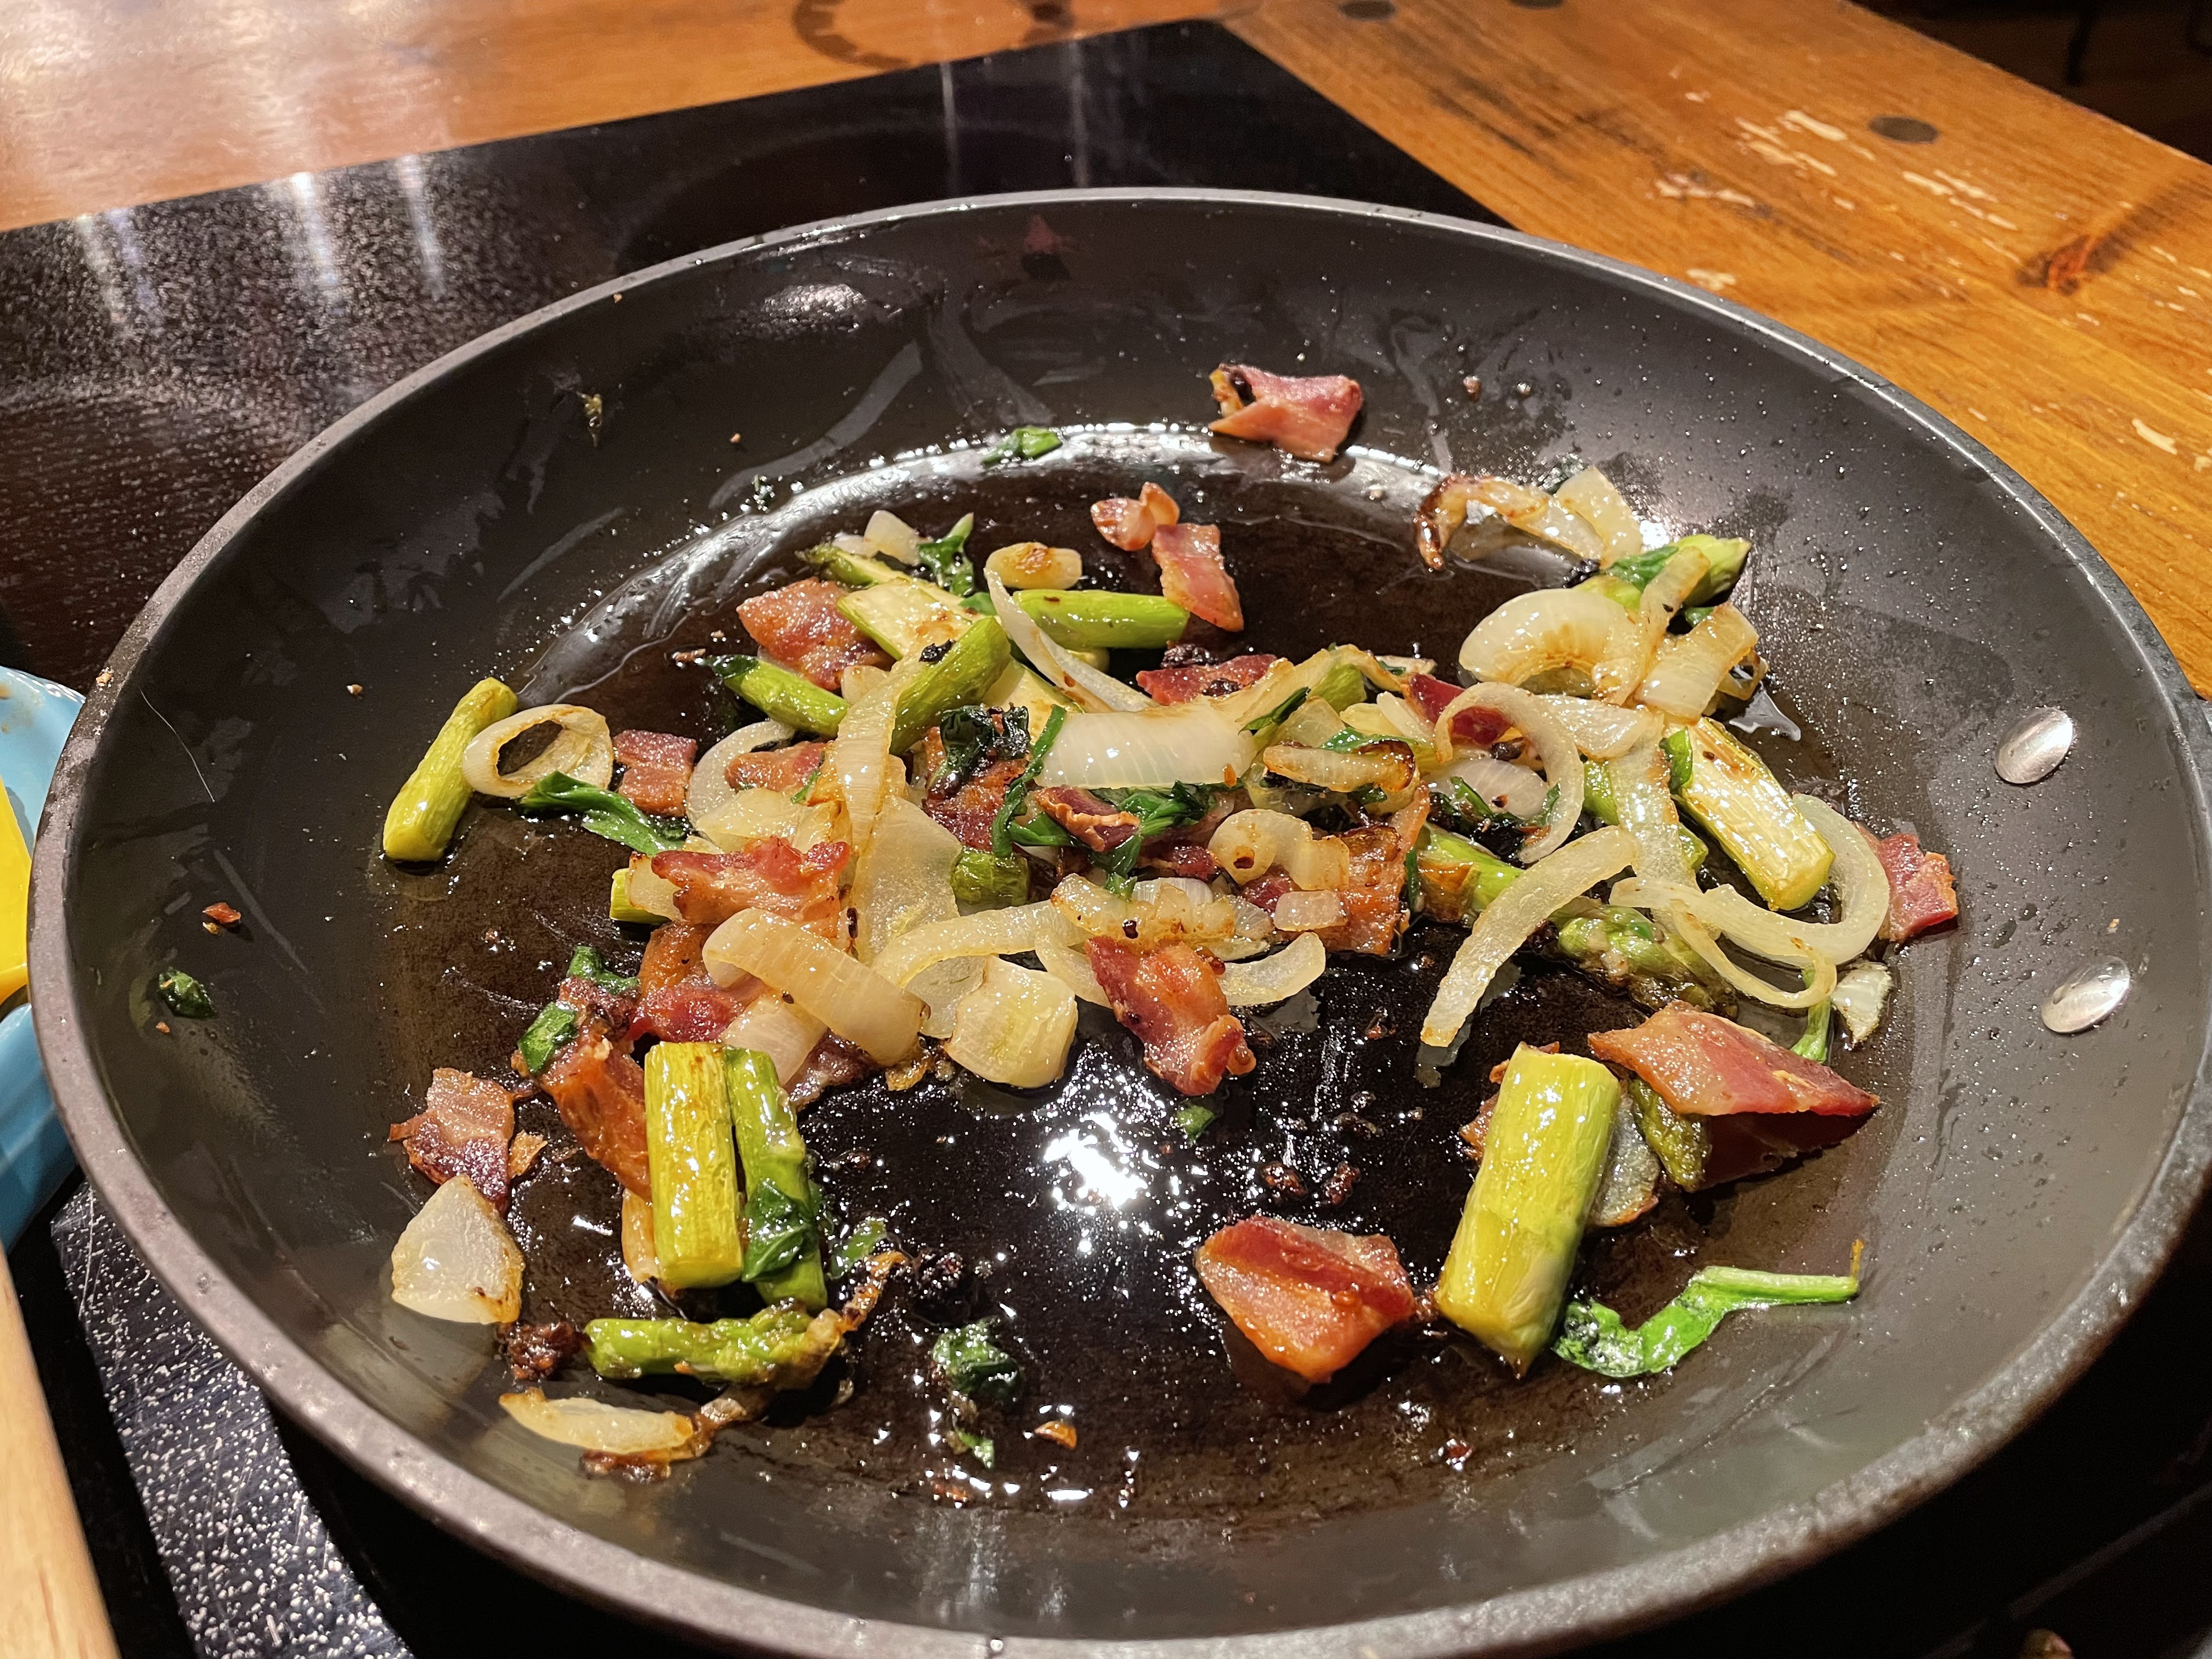
I chopped and sauteed my veggies to soften them. I mixed the eggs and milk while my veggies (and also the bacon at the end)  cooked down. I was lazy and bought a ready done, just-needed-baking pie crust which made the whole quiche process really quick and easy. In fact so quick and easy I need to make quiches more often.

Here's the recipe I used.

1) Pre-bake your pie crust either following the package directions or at 375 degrees F (190 degrees C) for 15-20 minutes until it  starts to brown and isn't raw dough any longer. Take it out of the oven and cool. The crust doesn't need to be cold, just cool, so it shouldn't take more than 10-15 minutes to be ready after it leaves the oven.

2) Chop and saute any veggies you'll use to soften them.  I also chopped up and reheated my 2 strips of left over bacon. Depending on the size of your piecrust, you don't need many veggies. My total came to just over 1/2 a cup.

3) In a bowl I whisked together 2 eggs, 1 cup milk (or use 1//2 cup milk and 1/2 cup cream or half and half), a pinch of salt, pepper and nutmeg.

4) When the crust is cool, put your sauteed veggie mixture at the bottom. Pour the egg mixture over that and then sprinkle with shredded cheese over the top. I used Swiss cheese as I couldn't find Gruyere at the store, but the choice is yours. You want to cover the top of the quiche with cheese but don't add a mountain of cheese. And if you don't want cheese, you could skip it.

5) Set your oven for 250 degrees F (about 120 degrees C). You want a cold oven so the eggs cook slowly. The recipe said the quiche will need to cook for 20-30 minutes, but my oven is on the cool side so it took 40 minutes for me. You know when it's done because there is NO wiggling of the filling on the top of the quiche. At that point the top should be just starting to brown.


Et voila. Here is my finished quiche. If you want more filling for a bigger pie shell, you could double the eggs and milk, just be sure you keep the ratio of those 2 ingredients the same. 

Too bad the hubby won't eat quiche. He'll eat a breakfast tortilla with eggs and veggies though. And he eats pie. I don't understand why he won't eat quiche, but then again, we all need some great mysteries in life. Oh well, more lunches for me. Smile.

Have a great Wednesday. And happy eating to you. 


Wednesday, May 18, 2022

Being Naughty-Twice!

 Hi everyone. 

It's the middle of the week and time to share some food over at Kathy's Food Wednesdays.

This week for Food Wednesday I am sharing 2 high calorie dinners I had over the past weekend.

I'll start with Friday night when my husband and I decided to have hot fudge sundaes for dinner.


My hot fudge sundae with coffee ice cream was yummy, even if it was about a million calories. I should mention my husband had taken the day off from work, and we had skipped lunch as he was working on finishing the floor in the spare bedroom project I've  mentioned too many times already. When he finished, we had an early dinner about 3 in the afternoon, so by evening we needed a little something but not a lot. An ice cream sundae seemed like a good choice.

Funny I don't eat much ice cream in the winter, but as soon as it warms up I could (but don't) eat it daily. My mom, who is 92, does eat it daily and has for years, so maybe there is something to it. 

And then on Sunday we also had an early dinner. This past weekend our favorite summer restaurant, Pop's Clam Shell, opened.  They are a take out place on one of the lakes near us that serves mostly high calorie fried food. 


We guessed Saturday with the sun and high temperatures the line would be really long so we decided to wait until Sunday when we were predicted to have showers. Hoping that would keep the line a bit shorter. From what we heard while waiting, it was over an hour wait in line on Saturday. I'm glad we went Sunday EXCEPT that they were out of lobster rolls. 😕

So I had a fried clam roll instead. 


As usual there were more clams than could fit into the roll. My husband had fried chicken tenders, and we split a small side of onion rings. And I was impressed that their prices either stayed the same or only went up $1 from last season, depending on what you bought. I do think I've had more clams when I've bought a clam roll before, but there was still more than enough here. In fact, they wouldn't all fit into the roll.

This week I am eating lots of salads and other healthy foods after this past weekend's being naughty twice binge.
OK, that's all for me this week. I'm  keeping my post short.
Thanks for visiting and have a great week!


Wednesday, May 11, 2022

A Mother's Day Treat A Little Early

 Hi everyone. 

It is finally warming up and starting to feel like summer. I will probably say it is too hot by the time we get to Friday, but right now, it is nice to be able to finally open up most of the windows and air out the house.

Since it is Wednesday, it's time for Kathy's over at   Hummingbird Studio at the Lake blog. This week I have something that will hopefully "not gross anyone out" but was a special treat my husband surprised me with for dinner last Friday night. And it's a meal I haven't had since probably before Covid was part of our vocabulary.


These are steamer clams.

Here in New England we have some yummy seafood, since 5 of the 6 states (Vermont is excluded) have some coastline. Even here in New Hampshire we have a whopping 16 miles of it.  I'm not sure these steamers came from New Hampshire waters, but I am sure they come from somewhere fairly local.

 I even know how to dig steamers, although now you need permits and there's no more free digging at the coast to get them. My Uncle Bob, who was married to my mother's sister, came from Downeast Maine. For those of you not familiar with the area, Downeast Maine is referred to the Maine coast north of Portland. Well quite north of Portland and up to the Canadian border with New Brunswick. Uncle Bob and my Auntie had a cabin (yes a real cabin with an outhouse as that was still allowed back then) on the ocean way up on the Maine coast not far from Canada.  They had a piece of land that had been part of a large area that had been charted to Uncle Bob's family back in the days when one of the King George's ruled us in the colonies and had issued the family a charter. (I've seen the charter. It is an impressive piece of history.) 

Anyhow, I spent many weeks in my youthful summers staying with them in their cabin, and I learned how to dig clams. We would go out with our hand rakes (they look like larger garden forks with  tines and slightly longer handles) and fill a bucket, and then we would steam them to eat. 

I can't show you in this post how to dig clams, but I can explain how to steam them when you buy them. If you already know how to do this, then I apologize for the repetition. It isn't really different than if you were to steam mussels. 

 1) You need to go through your clams. You want clams that are still alive, which means their shells are closed like this one in my next photo.


This next one is questionable. The black piece (called the neck) isn't hanging out too far, and it isn't flopped over  limply, so it might be OK. But because clams eat by filtering algae and other particles out of the water, I decided not to risk it. It's not worth getting sick over.


2) You rinse them off and put them in a pot big enough to hold them and some liquid for steaming.


You can steam your clams in plain water, salt water or my preference, beer with  a little water. This is what we had for beer, so I added that and some water into my pot. I wanted to cover the clams so they all would get the hot water and steam.

3) The steaming process doesn't take  more than a few minutes once the liquid has reached boiling. You want to see the shells open up .


4) Then you need 2 small bowls and one large one or an extra plate.  Fill one small bowl with melted butter and one with the broth you steamed your clams in. My broth is darker because I used a dark beer to steam my clams.  You also need a bigger bowl or an extra plate to hold the shells as you clean the clams.


5) When you open your clams, you pull them out of their shell, dip  into the broth, then into butter and now you eat them. I like to do a few clams at a time so I open several and leave them in the broth until I am ready for the butter dip and eating.


6) And my phone doesn't do close ups really well, but when you first open up the clam there is this wrinkly black skin on the neck.  It's right under my finger in this photo. You should remove that before you eat it. It won't hurt you, but it's better without it. It is really called the mantle, and in the live clam it is what produces the shell and may even produce a pearl.


It's pretty easy. And tasty if you like clams. My husband won't eat them as he says they taste like rubber bands. (And I still wonder how he knows what rubber bands taste like-smile.)

In a New England summer clambake, the clams would be an appetizer, followed by a steamed lobster, corn on the cob, and some type of potato, often baked. In a true old fashioned clam bake, you find a low spot between the rocks on the shore or you dig a hole in the sand at the beach, light a fire, and then cook your food here. In these types of clambakes, you would often have baked potatoes because you can cook them easier than say French fries.

There was no lobster to follow my yummy clams. Prices for lobsters are really high right now. One grocery store had them on sale for $9.99 a pound. It must be the high cost of fuel causing the crazy prices, although last summer before gas went over the top they were just as high. And I'm basically local to the coast where they catch them. I can imagine what the prices are if you need to ship them right now. 

Eating clams makes me think of summer and lots of ways, reminds me of some fun childhood memories. I hope I didn't bore you with the long post and the digression back to my childhood trips to Maine. 
Hope everyone is having a great week.


Wednesday, April 20, 2022

Another Sign of the Season

 Hi everyone.

Today for  Food Wednesdays  over at Kathy's blog-Hummingbird Studio at the Lake I have a spring inspired post. It is always exciting when this flag is hanging outside of the restaurant in my town.


When covid first hit and eating in restaurants wasn't possible, my husband and I started a new tradition of having an ice cream for our Sunday lunch. We'd do this as long as the ice cream window was open which in our town is usually mid-April to mid-October. 

We've continued this tradition since then. This is the start of year 3. 


The restaurant in our town serves huge portions. Enough where an ice cream can be lunch.


I had one of my favorites. It's called Aroma Joe's. Aroma Joe's is a local coffee chain, and this ice cream (not made by them but is an ode to them) is coffee flavored with peanut butter chunks and chocolate chip chunks too.  Funny, I don't drink coffee, but I love coffee ice cream.

This is a bigger size than I usually get, but the new teenage staff that man the ice cream window lost our order. When we went to ask about it, I guess they felt bad and gave us giant ice creams.

But I'm not complaining. 

Thanks for visiting. 


Tuesday, April 5, 2022

Pizza for Dinner

 Hi everyone. Happy Wednesday.

Today is time for Food Wednesday over at Kathy's blog, Hummingbird Studio at the Lake.

Last week started off very cold, too cold for spring or even the end of March. One day we hit a high of 24 degrees F (about -4 degrees C).  I must say I'm kind of food stuck right now, tired of heavier winter meals but not quite ready for lighter summer food. I either don't know what I want for dinner or am not sure what to have.

By the end of the week we were back to more normal temperatures, so Friday night we made our first pizza on the grill for the season. I actually made 2 pizzas on the grill, as my daughter was home.  


Neither of these were the biggest pizzas, since I split my sourdough dough in half to make them. They also started more round than they ended. But even though they had a rustic look, they tasted delicious. 

On the way home that night my husband stopped and got some fresh mozzarella from the market which we used as well as shredded mozzarella. Besides the thin crispy crust, the fresh mozzarella added a creamy taste to the toppings.

I've made pizza on the grill directly on the grill, first by lightly grilling the crust, then removing it, adding toppings and returning it to finish on the grill. I've also made pizza on the grill in a cast iron pan, which is what we did here. In the pan you don't need to first grill the crust at all.

We make pizza usually around once a week in my house, and I'm always looking for new ideas. Meat or no meat. Have you ever done pizza on the grill or used any interesting toppings when making pizza?

That's all for me food wise this week. If you have HBO, there is a new Julia Child show on, which is pretty good. I like how it shows the behind the scenes of her life while she was filming her French Chef TV show (which was my post last week). The characters (Julia, her husband, her editor, a friend) are very true to their times, and I like how it shows the characters flaws and how Julia thought about herself. My only issue is the actress playing Julia (Sarah Lancashire)  sometimes sounds like she has an Irish brogue, rather than her normal voice. But she does a great job otherwise. 

Have a great day, and thanks for visiting my blog. 


Wednesday, March 30, 2022

Watching Old Julia Child Cooking Shows

Hi everyone. Today I am joining our lovely hostess Kathy and all the other "foodies" over at Food Wednesday.

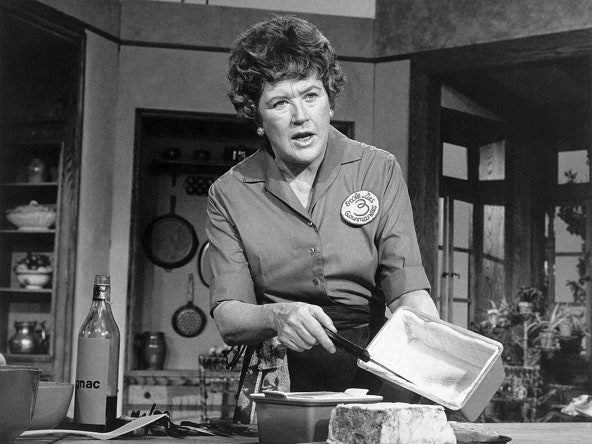
The past week there was not a lot of inspiring food made or eaten in my life, but I have been watching some old reruns of Julia Child's French Chef cooking show on one of the PBS channels we get. I'd never seen these except in little segments within another show. I have to say I've learned a few tips and did have some smiles too. They are very entertaining. 


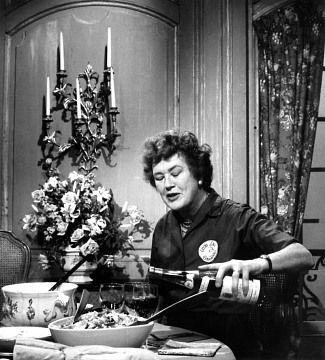
Julia had a great onscreen persona, and I like how in this show she manages, even with a bit of kitchen bumbling, to make the most wonderful looking foods. Mostly in black and white of course. And I am guessing her kitchen style is  very much how many of us home cooks would be also, even if she is probably more professionally trained than most home cooks. 

She knows what she's doing; she skilled at techniques, but you can tell these weren't filmed over and over until she got it all perfect. I think that is another part of the charm of these old shows.


My favorite lines from the episodes I have watched is how, when she was cleaning off her counter, she brushed all the scraps on the floor saying she'd just get those out of her way. Obviously realizing that at home the cook would be the one who must clean them those scraps, she said (in so many words) that it was easy to make such a mess when you had an automatic floor cleaner because some else would sweep them up.

It is also interesting getting a glimpse at the kitchen and equipment she used. The show ran from 1963-1973, and I am sure the kitchen was state of the art then. Now it looks dated, and I am sure many modern chefs would miss their modern kitchen equipment for some of the prep tasks needed. Julia also had this one contraption for cooking an oversized zucchini she was going to stuff. It looked like an oval washbasin with these big heavy chains to lift it out of the pan of boiling water. I don't know if that was a real tool or something concocted for the show. And in the last episode I watched, she was using a duck press. I was curious how it was used, but also a little disgusted too. I guess I am one of those folks who sometimes doesn't want to know where (and how) their final food comes from.

It's fun seeing most of these cooking tools though, to see where we are now in the kitchen and comparing it (for me at least) back to things from my childhood.


And she always end going into her dining room and sitting at the table.

This next photo shows Julia in her own home kitchen. If you don't know, it was donated to the Smithsonian Museum. 


As you might already know, Julia Child had a fascinating life. She worked in military intelligence during World War 2,  lived in various places in Europe, went to cooking school when she was approaching middle age, wrote cookbooks and even had her own cooking shows. She was  49 when her most first and most famous cookbook was published. 


She co-wrote that book with 2 Frenchwomen, Louisette Bertholle and Simone Beck, making French cooking accessible to American home cooks.

I will admit, that like many people,  I enjoy reading and learning about Julia. She certainly was a woman ahead of her time and definitely a role model for so many other people.

I can't say I've read every book about Julia, and I'm certainly no expert, but here's a few I have read, just in case you  are curious about reading of her life also.


These books were all very good.

That's all for me today. I'm sure many of you might know more about Julia Child than I do, but she is always worth your time.

Have a great rest of your week.


Wednesday, March 16, 2022

Making Bagels for Food Wednesday

 Hi everyone. Hope your week is going well so far. 

Today I am joining everyone including our  hostess Kathy over at Food Wednesday.

Last week I had a hankering for a bagel.  We had bought some maybe a month ago, and they had tasted good. Then they were gone, but I still wanted one. This time instead of going to buy some more, I figured since I had the ingredients and the time, I would make some.

I used the recipe from this cookbook I have and that I'll describe in this post. I've made them with this recipe before, and they aren't difficult to make, except there are several steps  and you need to time what you do.  You also need to let them raise in the fridge overnight, so it is best to make the dough later in the day or evening. It's a fun occasional baking project, but not something I think I would want to do just because I feel like a bagel. (But worth the time and effort as they do taste great.)

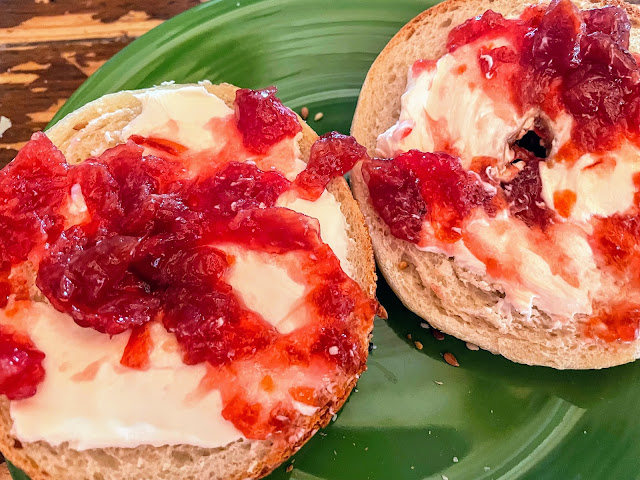
I was making plain bagels. This cookbook also has recipes for wheat and other bagels, but I wanted plain so I could use cream cheese and some cherry jam I have on them.

For ingredients and steps:

 You start with 2 teaspoons of dry yeast, 1/2 tsp. of sugar and 1 1/2 cups of lukewarm water. You mix those and let them sit 5-10 minutes until bubbly.

While they are sitting, you put 4 cups of bread/strong flour, a pinch of salt, and a recommended 1 heaping tablespoon plus 2 teaspoons of diastatic malt powder together in a bowl. This malt powder gives a good rise because it adds enzymes that help the yeast make use of the starch in the flour.  There are substitutes you can add to replicate the taste but I'm not sure the substitutes add the enzymes.

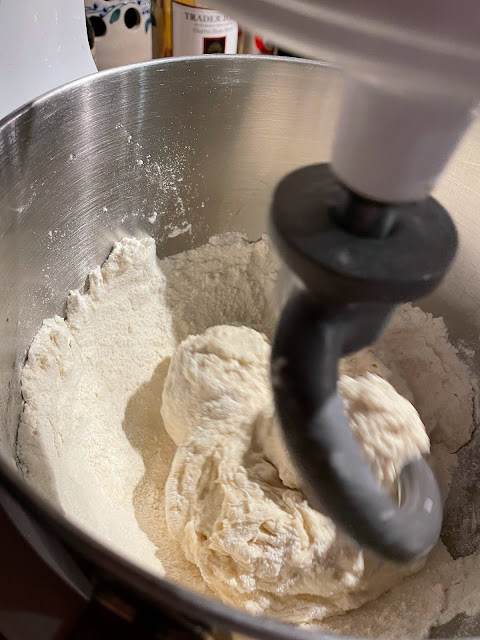
Once your yeast liquid is bubbly, add it to your flour mixture. This recipe recommended using a mixer, first 3-4 minutes on low or until your dough starts to come together, and then for 5-7 minutes on medium to complete the dough and kneed it. 


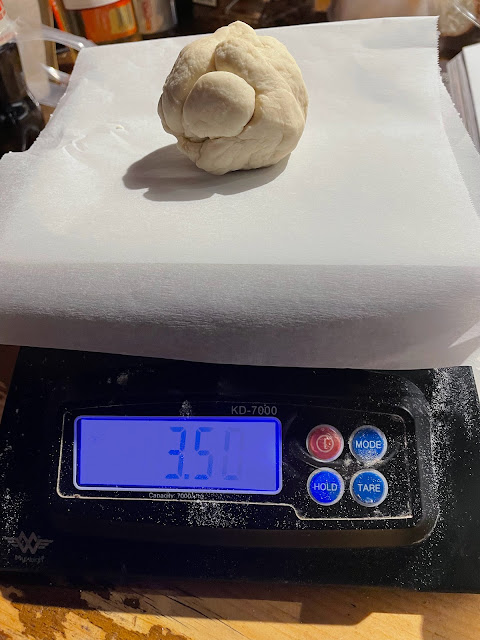
Let the dough sit a few minutes, and then separate it into balls. It is not a sticky dough at all.  I used a scale to measure my dough balls so they would be of similar sizes, but you don't really need to do that. This recipe should make 8-10 bagels, depending on the size you want them to be. Then let those sit for 10-15 minutes. 


I ended up with 10 bagels, using approximately 3.5 ounces of dough for each.

Then you shape the dough balls into rings, put on a parchment lined or greased baking sheet and refrigerate for 12-18 hours.

To make the rings: use your hands to roll the dough from a ball shape into a line shape. Then take the 2 ends of your rolled out dough and twist them together. Be sure you overlap the 2 ends of the dough when you twist them, and with your fingers, carefully kneed the twist into a  solid piece of dough.

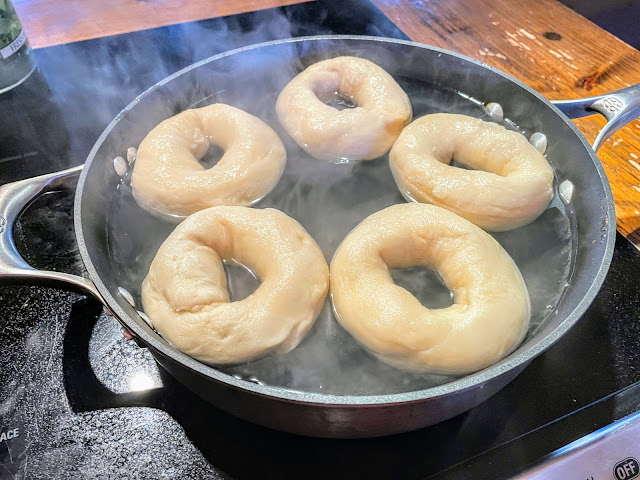
The next morning I preheated my oven to 500 degrees F (260 degrees C).  This recipe recommends a baking or pizza stone. Let that heat up with the oven for at least 30 minutes. Once that time approaches, boil some water in wide pan and then turn it down to a simmer. Don't take your bagels out of the fridge until you are ready to cook them otherwise they may rise and close in the hole.


You should put the puffy side down into the boiling water first, and then after 30-60 seconds flip them. After 30-60 seconds of the other side being down, remove them from the water and let the excess drip off. Then put them directly onto the baking stone. Let them bake for 10 minutes, then flip them over and bake another 3 to 5 minutes until they are shade pf golden brown you would like.

As you can tell, there are a lot of steps to this process; none of which are hard, but they do require your attention.

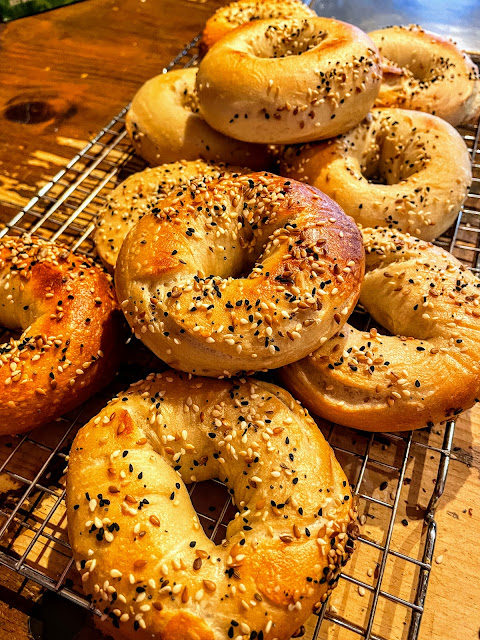
 I added some everything bread topping to mine, which I did when I first put them on the stone, before they had baked.

The finished bagels are  yummy though.


Especially if you have a high carb lunch splurge. Smile.


If you are interested in the actual recipe or have any questions, let me know. And as this is a food post, I will quote Julia Child and say "Bon Appetit."

Thanks for visiting.


Wednesday, March 2, 2022

My Second on the Second is About Food

Hi everyone. Happy March 2. 

Today is Food Wednesdays over at Kathy's blog, Hummingbird Studio at the Lake where we share a food related post. It is also  Second on the Second over at Bleubeard's and Elizabeth's blog, Altered Book Lover Blog where we share a post we have already posted at some time in the past.

To join these 2 challenges,  I am sharing  2 older posts from March of 2018, both which have to do with a seasonal specialty that is in full swing right now in the Northeast of the US. It is Maple Syrup season. This is the time that the maple sap runs, and that sap carries the sugars which make maple syrup so yummy.  

I'm not sure exactly when in the spring other places (that have maple syrup season) start their sap season and of course, even though you can make syrup from some other types of hardwood trees, you can only make maple syrup where maple trees, especially sugar maples, flourish.

Here's a journal page I had created showing some trees being tapped. I can't join Valerie's spring challenge at Art Journal Journey because my page has been posted before, but this is a sign of spring here in New Hampshire. 


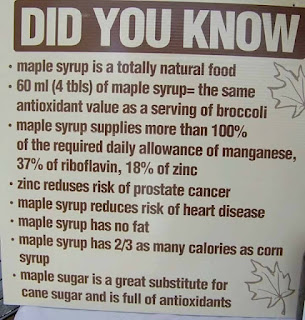
And I know some people can't use a lot of Maple Syrup because of its sugar content, but other than sugar, it does have some nutritional value.


These first 2 photos are from a post on March 16, 2018. (Sweet Friday).

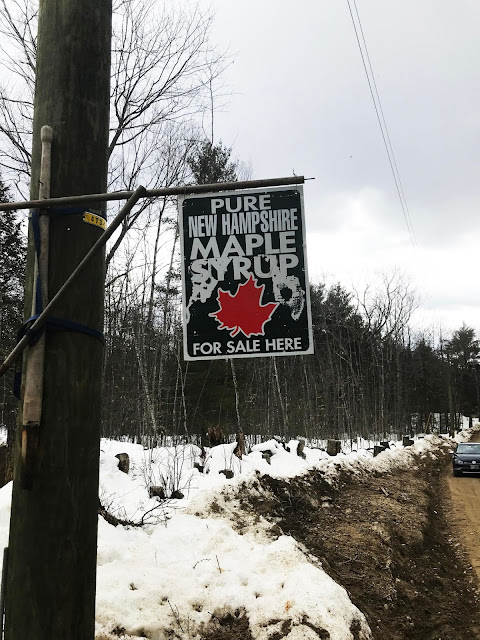
 I live on an unpaved gravel road in the woods. My road is about 3 miles or just under 5  km long, with a few scattered houses on it. There's also a lot of land that is part of the Society of Protection of New Hampshire forests so it is not developed. Yet on my road there are 2 "industries": a sugar shack where maple sap is collected to make maple syrup and also we have a small microbrewery on a private small scale farm. 

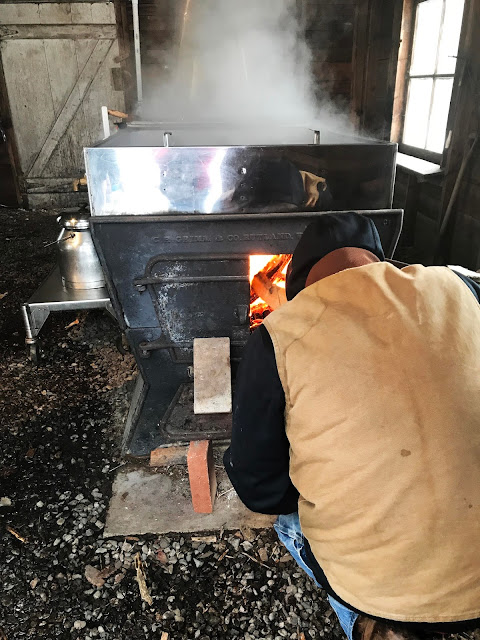
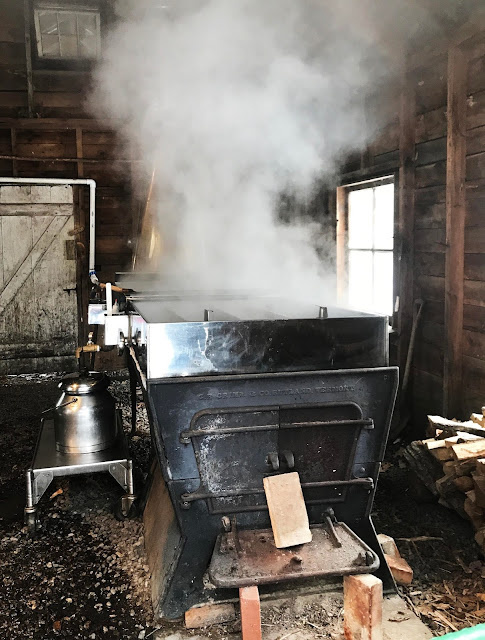
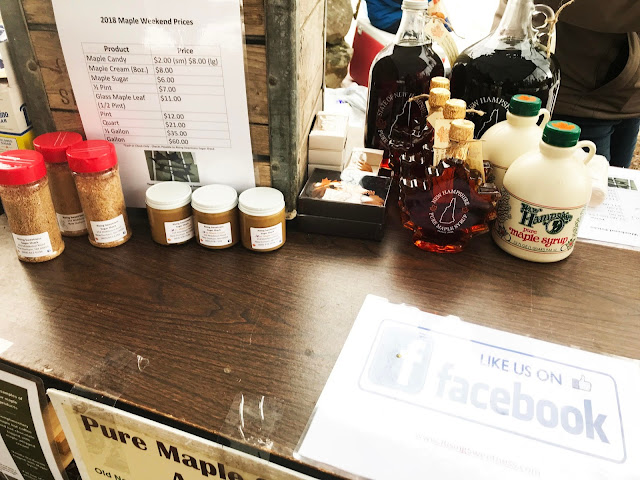
Today let me share a bit of sugar making with you. These next photos come from March 26, 2018 (Maple Weekend). I had been out walking that morning and stopped by to see what was going on in the sugar shack. 

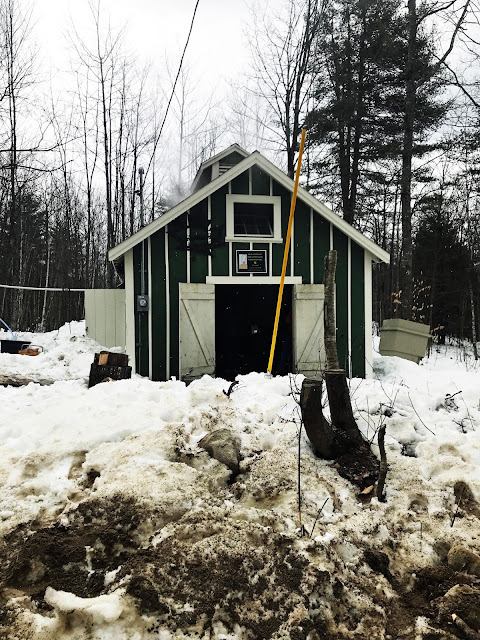
Here's the sugar shack. It used to be more rundown, but then it was leased from the land owner to a couple of "guys" who  fixed it up and now use it for maple sugar production.


These big tanks hold the sap collected from sugar maple trees. Unlike in my sketch where buckets are hung from metal taps hammered into the trees, the new way is to use this blue piping so the sap runs directly from the trees into the collection tank. Then it is piped from the tank into the sugar shack, where it is processed in maple syrup.


The small process/old fashioned way to process the sap is to keep a wood fire going under your steamer. It heats the maple sap and gets rid of much of the water in it. You can see it steaming away. What you are then left with is your maple syrup.


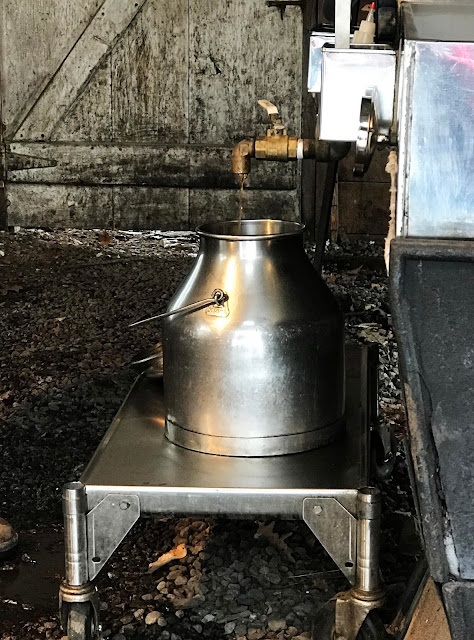
Then the maple syrup is drained into these cans. It take 40 gallons of sap to make 1 gallon of syrup.


It is then bottled to sell or even dehydrated even more to make maple sugar.


My daughter's fiance's parents have a sugar shack and tap the maple trees on their property. There's been some talk we might go out there and spend a day helping them do some sap processing. I think that would be fun, but we'll see if that happens. The season for sugaring isn't very long because it only happens when there are cold nights and slightly warm days (but not too warm as the trees stop running sap then). 


That's it for me today. Hope the new month is treating you well.